
Creating a floor plan is one of the most important parts of designing a functional and beautiful space. Whether you are planning a single room makeover or a complete home renovation, a well-thought-out plan helps you visualize how everything will come together. Interior designers, architects, and homeowners rely on floor plans to save time, avoid costly mistakes, and ensure that every detail works in harmony.
What is a Floor Plan?
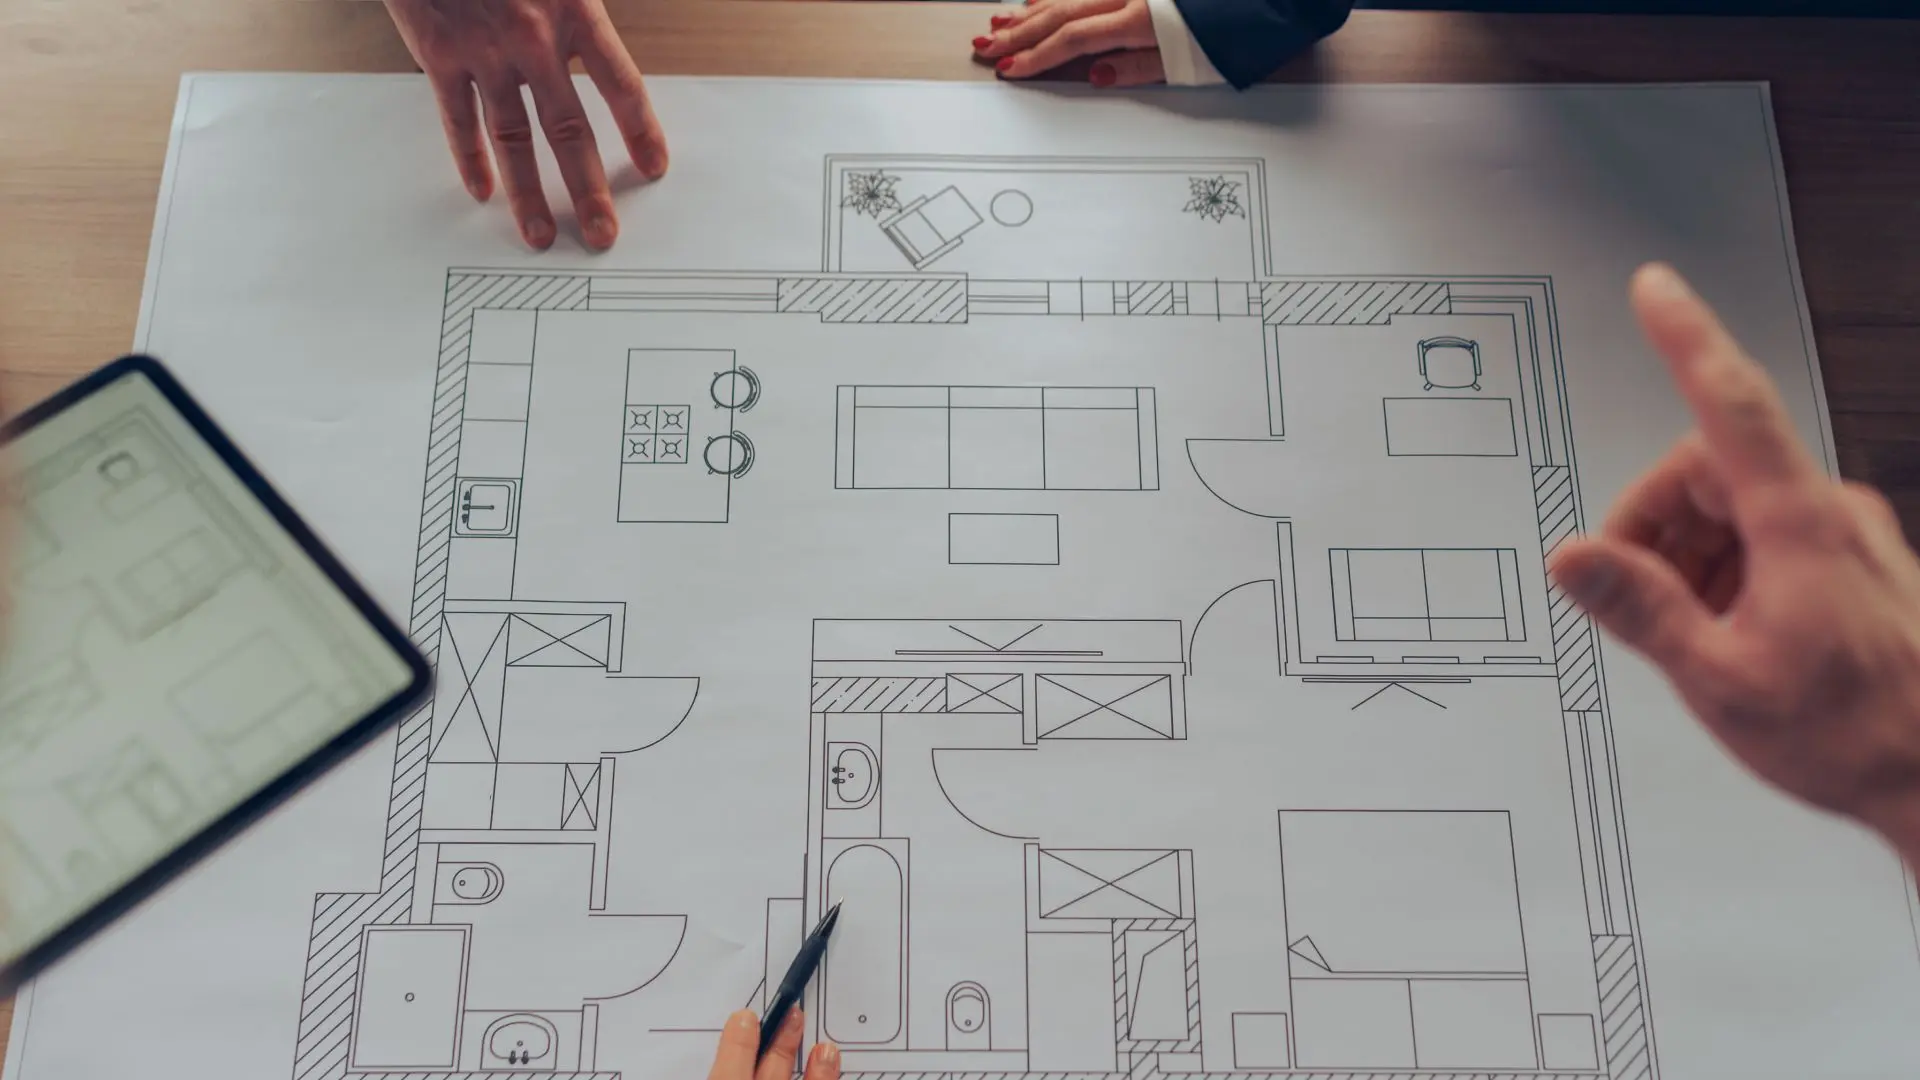
A floor plan is a scaled diagram that shows the layout of a room or entire building from a bird’s-eye view. It includes the placement of walls, doors, windows, furniture, and other elements. By putting everything on paper (or digital tools), you can see how space will look and function before making any real changes.
Why Floor Plans Matter in Interior Design
- They help in visualizing space usage.
- They make it easier to test furniture arrangements.
- They assist in planning traffic flow within the room.
- They provide a clear guide for contractors and builders.
- They reduce design errors and unexpected costs.
A Floor Plan for Interior Design acts as a roadmap, helping both professionals and homeowners ensure the design fits lifestyle needs and looks aesthetically pleasing.
Tools You Can Use to Create Floor Plans
There are several methods you can use, depending on your comfort level and project needs:
- Graph Paper & Pencil: A traditional method for simple layouts.
- Software Programs: Tools like AutoCAD, SketchUp, or RoomSketcher.
- Mobile Apps: Easy-to-use apps for beginners, such as Floorplanner.
- Professional Services: Hiring a designer for more complex projects.
Step 1: Measure the Space
Start by taking accurate measurements of the room. Use a tape measure to record:
- Length and width of walls
- Placement and size of doors and windows
- Ceiling height
- Any architectural features (columns, fireplaces, beams)
Write these down or create a rough sketch to transfer later into a neat drawing.
Step 2: Draw the Outline
Once measurements are ready, draw the room outline. Keep everything to scale so that proportions are correct. For example, 1 square on graph paper could represent 1 foot. If you’re using software, it will automatically scale for you.
Step 3: Add Walls, Doors, and Windows
Next, place the structural elements:
- Mark all walls, both permanent and temporary.
- Show where doors open and in which direction.
- Add window placements for natural light consideration.
These details help in planning furniture placement and lighting.
Step 4: Plan the Furniture Layout
Think about how the room will be used and arrange furniture accordingly. Keep the following in mind:
- Leave enough space for walking paths.
- Group furniture based on function (e.g., seating area, dining area).
- Avoid overcrowding the space.
Sketch in sofas, beds, dining tables, and other major pieces first, then add smaller items.
Step 5: Consider Lighting and Electrical Points
Lighting is just as important as furniture. Mark the locations of:
- Overhead lights
- Lamps or wall-mounted lights
- Electrical outlets for appliances and devices
Proper lighting enhances mood, highlights design features, and ensures functionality.
Step 6: Test Different Layouts
Don’t settle on the first layout you draw. Experiment with:
- Shifting furniture for better flow
- Trying alternative room functions
- Testing how natural light affects furniture placement
This flexibility allows you to find the most practical and attractive arrangement.
Step 7: Add Finishing Details
Once the major layout is complete, you can layer in the finishing touches:
- Rugs and carpets
- Artwork placement
- Indoor plants
- Decorative accessories
These details add warmth and character, turning the basic layout into a lived-in design.
Common Mistakes to Avoid
- Ignoring measurements and guessing sizes
- Blocking windows or pathways
- Overloading the room with too much furniture
- Forgetting about electrical outlets
- Not thinking about future changes or flexibility
Using Floor Plans for Better Communication
A floor plan is not only for personal use—it helps communicate your design vision clearly to contractors, builders, and even family members. Everyone involved in the project can see the same blueprint, which avoids miscommunication and ensures smoother project execution.
Pro Site Plans for Professional Results
If you want a polished and accurate plan, Pro site plans can be a valuable solution. These services provide detailed, professional-quality diagrams that go beyond simple sketches. They include precise measurements, scaled layouts, and advanced features such as landscaping, exterior planning, and 3D visualizations. By using pro site plans, you can save time, improve accuracy, and create a design that’s ready for contractors or official approvals. Whether you’re redesigning a single room or an entire property, having a professional plan ensures your interior design project looks great and works flawlessly in practice.