
When installing a dryer, most people think about getting it to run quickly, but a safe vent connection is even more important. Improper setup can cause airflow issues, overheating, and even fire risks. To avoid costly mistakes, it’s crucial to understand the safety tips for dryer vent hose installation.
Why Does Dryer Vent Hose Safety Matter?
Your dryer doesn’t just heat clothes—it pushes hot air, lint, and moisture through ducts that must exit outside. If the vent hose is poorly installed, lint can clog inside the pipe, exhaust may leak into your home, and the dryer will work overtime. This leads to high energy costs, frequent repairs, and safety hazards. Safe installation ensures your home stays protected.
What Are the Most Common Problems in Vent Hose Installation?
Many homeowners face avoidable issues during installation. Using weak plastic ducts, leaving gaps at the wall connection, or adding too many bends in the hose are typical errors. These mistakes restrict airflow, causing the dryer to overheat and wear out faster. Loose clamps, torn flexible tubing, or clogged exterior wall vents are also widespread problems. Spotting these issues early helps reduce fire risks and costly replacements.
What Benefits Come from Safe Dryer Vent Hose Installation?
A safe, well-installed system offers several advantages. Drying cycles become shorter because air flows freely. Lint build-up is minimized, lowering the risk of fires. Semi-rigid or rigid aluminum ducts last longer than flexible vinyl hoses, reducing replacement frequency. Safe venting also directs moisture outdoors, protecting walls, floors, and attics from mold or structural damage.
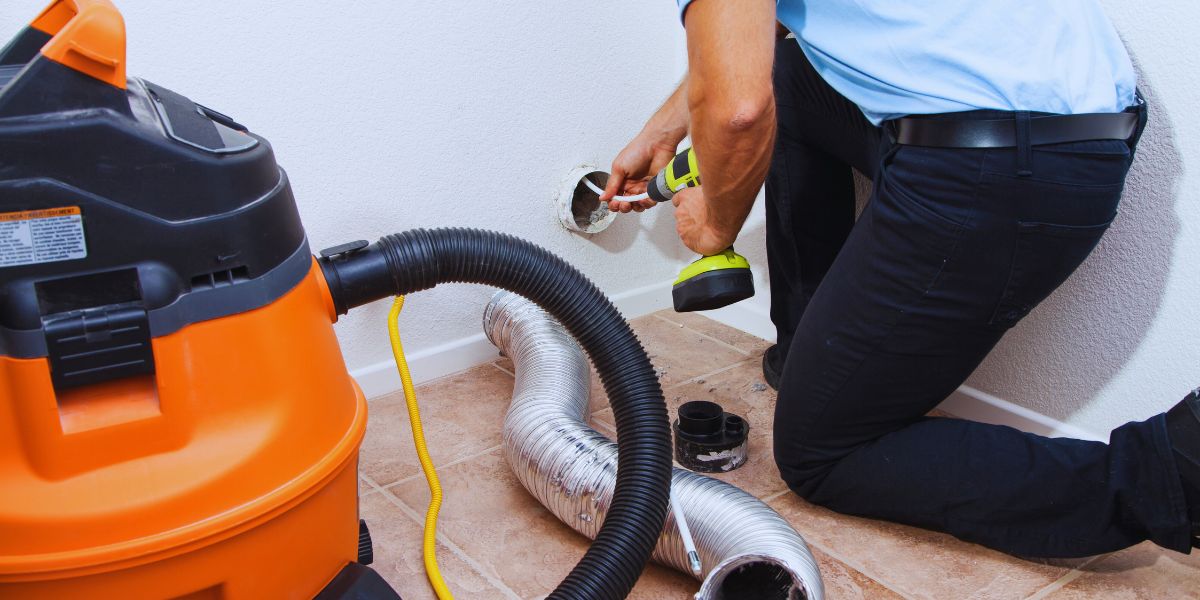
What Is the Proper Way to Hook Up Dryer Vent Hose?
The proper way to hook up dryer vent hose begins with choosing the right size—usually a 4-inch hose—to match both the dryer outlet and wall vent. Attach the hose with a metal clamp and seal it using foil tape to prevent leaks. Avoid screws, as they collect lint inside the duct. Keep the path as short and straight as possible until it connects to the outside hood vent or roof cover. Following this method ensures maximum airflow and safety.
What Do Experts Say About Vent Hose Installation?
“Most dryer problems don’t come from the appliance itself but from bad vent installation,” explains James Whitfield, a certified dryer repair technician. “Choosing rigid ducts, sealing them with foil tape, and checking the exterior vent cover regularly are simple steps that prevent dangerous lint build-up.”
What Are the Costs Involved in Dryer Vent Hose Installation?
Here’s a breakdown of average costs for vent hose installation and accessories:
| Item/Service | Average Cost (USD) |
|---|---|
| Flexible Aluminum Hose (per 8 ft) | $10 – $20 |
| Rigid Aluminum Duct (per 4 ft) | $15 – $30 |
| Complete Vent Installation Kit | $20 – $45 |
| Exterior Vent Hood with Cover | $15 – $35 |
| Clamps, Connectors, and Tape | $8 – $15 |
| Professional Installation | $120 – $250 |
| Annual Vent Cleaning | $90 – $180 |
Disclaimer: Costs vary depending on material, location, and whether you do it yourself or hire a handyman near you.
What Key Features Should You Look for in a Vent Hose?
- Material: Rigid ducts are strongest and safest.
- Flexibility: Semi-rigid hoses fit small laundry areas.
- Size: Standard 4-inch tubes match most dryers.
- Connections: Kits with clamps and connectors simplify setup.
- Heat resistance: Only UL-rated hoses should be used.
- Cleaning ease: Straight duct designs are easier to unclog.
What Safety Measures Should You Follow During Installation?
Always choose semi-rigid or rigid aluminum instead of vinyl hoses, which melt under heat. Seal joints with foil tape, not duct tape, since it withstands higher temperatures. Leave a gap between the dryer and the wall to prevent the hose from being crushed. Check the outdoor vent hood frequently to confirm it opens freely. Finally, schedule professional cleaning once a year to avoid dangerous lint blockages.
When Should You Call Emergency Services for Vent Hose Issues?
If your dryer feels hotter than usual, laundry takes longer to dry, or you smell burning lint, your vent hose may be clogged. Emergency repair services can quickly unclog vents, replace damaged ducts, and fix loose connectors. Immediate action keeps your home safe and prevents costly dryer damage.
FAQs:
1. Which vent hose type is safest for dryers?
Rigid aluminum ducts are best.
2. Can I use flexible plastic vent hoses?
No, they are unsafe and not recommended.
3. How long does a dryer vent hose last?
Usually 5–7 years with proper care.
4. What size vent hose do I need?
Most dryers require a 4-inch hose.
5. Can I install the vent myself?
Yes, but professional installation is safer.
6. Should I vent my dryer through the roof?
It’s possible but harder to maintain.
7. How should I seal duct connections?
With foil tape and clamps, not screws.
8. How do I know if my vent is clogged?
Slow drying and overheating are signs.
9. Can I use duct tape for vent hoses?
No, only heat-rated foil tape is safe.
10. Do vent cleaning kits really work?
Yes, but pros provide deeper cleaning.
Conclusion:
Dryer vent hose installation may seem simple, but it has a big impact on safety and performance. Using rigid ducts, sealing connections properly, and following safety tips ensures your dryer runs efficiently. Learning the proper way to hook up dryer vent hose helps prevent fire risks, keeps energy bills low, and extends your appliance’s life. Don’t wait for warning signs—inspect your vent system today and, if needed, call a professional near you for safe installation and maintenance.
Read More: Our Services